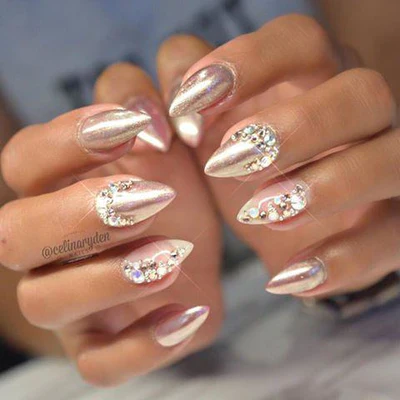
Chrome is taking the nail world by storm... AGAIN. This technique has been circulating the nail industry for almost 20 years and has recently made a come back after popularity with Hollywood celebrities.
Chrome nails are created by rubbing a powder made of fine metals, glass and pigment over your nails, with a soft and spongey eyeshadow brush, until the fine powders are flattened down creating a mirrored, holographic or glazed donut effect.
How To Master Chrome Nails In 4 Easy Steps
1. Apply onto partially cured tack-free top coat (time will vary depending on product and lamp). You may need to experiment with curing time. Start with 15 seconds.
2. Pat down chrome powder, covering the entire nail. Once the nail is covered with chrome, rub the powder into the nail.
TIP: If chrome comes off when rubbing it in, the tack free top coat was cured too long. If it looks sparkly or the chrome doesn't move, it was not cured enough (the gel is too sticky).
3. Once your desired look is achieved, recure the nails for another minute to set the chrome into the top coat.
TIP: Do not finish file or buff the chrome. This will just remove the chrome.
4. Finish the nail with your preferred top coat and don't forget to cap the free edge. Cure for 30 seconds to 2 minutes, depending on the required time for the top coat.
Tip: If you experience issues with chrome chipping, apply a thin layer of a clear base gel such as JimmyGel over your chrome and cure before applying the final top coat.
Once you master chroming, try applying this skill to other gels or colors without using a tack free top coat as your base. You can chrome almost any gel, color, buttercream, or gel polish once you understand the basics of this technique.
Have fun and enjoy!!


